Monday 28 February 2011

Sparkly Pink Cupcake

I just can't stop making these cupcake cards! This one is for the Secret Crafter Challenge which is:

Sweet Treats

The template is from Polkadoodles Paper Boutique Vol 3 and this is the pink version! Ribbon is from my stash and I've added glitter glue and glossy accents to the chocolate stars. The sentiment star is also included with the template and I've used the pre-printed one here.

The card stands up via a concertina band between the front and back; the ribbon fastens both sides together, so you have to undo it to view the message inside! Really lovely and quick card to make!

  • All paperbased elements: Polkadoodles Paper Boutique Vol 3
  • Everything else: My stash

Black, White and Red

A quick and easy card theme from the Charisma Card challenge this week:

Black, White + 1 other Colour

I've gone with red (is it obvious?!) as my one other colour. I've used the Our Betty stamps (Your Special Day set) and coloured them with Promarkers and a little liquid pearls. The balloons I stamped twice with the second image I cut out and layered using foam pads. The sentiment is from the same set too.

The black card is from my stash and has been cut from the same huge sheet as this card, the red is printed from Craft The Year Away also from Funky Hand. And the black sequins were sent to me in a RAK from Teresa all the way from South Africa and I've added red seed beads to the top.

  • Stamps: Your Special Day - Our Betty stamps from Funky Hand
  • Papers: Craft The Year Away from Funky Hand
  • Sequins: RAK from Teresa
  • Everything else: My stash

Sunday 27 February 2011

Shake It!

Sometimes I see a challenge and I think - yeah, I'll have a go at that. Then I spend the next three days mulling it over, that is once I'd coloured the image as I knew which one I wanted to use. Then I decide I can't work it out and put the idea out of my head. Then inspiration strikes me when I've got a quiet moment (not many of those this last week I can tell you!) So I decide to make it.

And when I do it takes me all of 90 minutes to make! Rarely do I make a card on a whim - I usually spend quite a while thinking about it and working it all out which is why I generally have at least 6 or 7 cards or projects on the go at any one time. My time is limited and I have to plan it carefully and because I've been the domestic goddess this last week and done enough cleaning to last a lifetime (and its not over! and where the hell does all the bloody dust come from? I've only just cleaned it!!) I've had time to ponder.

Enough waffle. Here is the shaker card I've made for the Tiddly Inks challenge:

I made the card blank myself from a lovely large sheet of very nice silver card that I found (under Samuel's bed), cut out the aperture, stuck the acetate on, added 3d foam pads around the inside edge, added silver and pink seed beads and then the image (coloured with Promarkers plus chalked behind). I then added the frame to hide my rubbish knife lines, inked them and drew a border.

Then decided it looked a bit too bare and added the bunting. Papers are from my stash and so too the black embroidery thread. Good job its a very girly card as Jacob was quite taken with this offering too. Although he has asked for a shaker card for his Birthday (September). But not with beads. Sweets. I said I'd think about it......

  • Image: Tiddly Inks, coloured with Promarkers
  • Papers: Not sure as found in my box of bits
  • Everything else: My stash

Get Funky Challenge - Show Us Your Heart

It's my turn to provide you with some inspiration (hopefully!) for the Get Funky challenge! Every second day from the Funky Fifteenth until the following month each Design Team member will reveal their contribution to the challenge. And today it is my turn!

Jules has set the challenge which is:

Show Us Your Heart

One of the rules of entry is to use an element from Funky Hand. If you don't have anything there is a freebie in the download section on the Funky Hand website for you to use and it also ties in with this months challenge. I've used the freebie paper in my creation - can you spot where?!
I've used one of my templates to make this bag, using a Queen & Co fastener to close it along with a random brad I found in my stash. I've added seed beads for detail and the flower has been made with a Sizzix build a flower die. All the papers are from Craft The Year Away plus the Funky Freebie for February.

I've added glossy accents to the hearts for a bit of shine. And the ribbon is from Hobbycraft.

Good luck in entering the challenge - for more details click HERE to go to the challenge blog!

  • All paperbased elements: Craft The Year Away and February Funky Freebie
  • Fastener: Queen & Co
  • Ribbon: Hobbycraft
  • Everything else: My stash

Saturday 26 February 2011

Newcastle United

No, Penny Black has not released a stamp that is unique to Newcastle United! I've adapted it slightly to the team colours, just in case you were wondering! I've coloured it with Promarkers and for the sky I've used a watercolour pencil. Its for the Passion for Promarkers challenge, which is:

One For The Boys

The sentiment is computer generated and its all layered onto some really lovely black card that is sort of rubbery to touch! When cleaning under Samuel's bed (I've had a run for cleaning this week!) I found a big stash of very large sheets of card that I'd forgotten I had, so I've dug some out to cut up for card blanks otherwise it will stop under there for ages again!

I think this is one of the simplest cards I've made for a while - but then again, blokes don't go for the ribbon and bling thing so this is probably enough!

  • Image: Penny Black, coloured with Promarkers
  • Sentiment: Computer generated
  • Everything else: My stash

Birthday Cupcake

There are a lot of Birthdays coming up in March, so I am trying to get ahead and be organised! Famous last words! The Cupcake challenge this week is:

Cake 'n' Ice Cream

So I've made this very cute and quick cupcake with generous amounts of glitter glue and glossy accents! It's from Polkadoodles Paper Boutique Vol 3 and I've used the A5 pre coloured size, cut out all the elements and then layered them with foam pads.


I've then punched two holes through the cake so I can tie the ribbon through which then keeps the card together. Really quick and easy to make but looks really good. Almost good enough to eat!

  • All paperbased elements: Polkadoodles - Paper Boutique Vol 3
  • Everything else: My stash

Simply Create Challenge 38 - Say It With Flowers

Welcome to another Simply Create challenge! This fortnight we want you to

Say It With Flowers

I've used one of the templates from the new Polkadoodles cd Paper Boutique Vol 3 and printed it A5 size and pre-coloured. All the elements were then cut out and layered up - really easy and you can make it as layered as you want - with foam pads then I added some sparkle to the flower centres and hand wrote the sentiment.

There is a little hidden extra with the card - the centre part actually pops out and the message could be written on there too! Really effective but easy to make!

Good luck with the challenge - you have until Thursday 10 March to get your entry in! For more details pop over to the Simply Create challenge blog and whilst you are there have a look at the other Design Team samples!

  • All paperbased elements: Polkadoodles - Paper Boutique Vol 3
  • Sentiment: Handwritten
  • Everything else: My stash

Friday 25 February 2011

Polkadoodle Challenge 8 - StashBox Stamps & Extras

It's Friday again and time for another Polkadoodle challenge! This week Enfys has set the challenge which will be a regular monthly feature called Stashbox Stamps!

Basically, it means that the Design Team get to raid their non Polkadoodle stamps and to use them with Polkadoodle papers and elements so you can see just how versitile Nikky's CD's are!
As the Design Team are using their stashbox stamps, the challenge is to use:

2 different ribbons and a charm

You can make the charm if you want - just as long as there is a charm on your creation along with two different ribbons! I've used a Penny Black stamped image that I've had in my stash for ages and it was fancily cut around the edge just as you see so I've kept it and not trimmed it down. I've coloured it with Aquamarkers, layered it onto some black card from my stash, added tiny black half pearls to the corners and layered it all onto a paper from Sundae of Seasons.


The ribbons are from the Scrap Store and I've made the charm using two fancy beads donated to me by Lynsey a while ago! And the colour was a perfect match to the papers.

Good luck with the challenge - please pop over to the Challenge blog to see the rest of the Design Team creations and to view our rules. The challenge is open until Sunday 6 March at 12noon GMT.

  • Backing paper: Sundae of Seasons
  • Image: Penny Black, coloured with Aquamarkers
  • Ribbons: Scrap Store
  • Beads: Lynsey

Thursday 24 February 2011

Promarkers and Blending

I do like my Promarkers. A lot. And when I saw the little competition on Enfys' blog, well, I just had to indulge! I started off using felt tips (and that was not so long ago) to colour my images when I wanted more zing and intensity, so armed with a set of 48 felt tips from Tesco (a bargain at £2.50!) I learnt how to blend and build up colour. The hard way. Felt tips don't, won't and can't blend. But Promarkers do!

Even when the image has been left for a while, you can still go back and layer more colour over the top or add a complementary colour and build it up that way.

Personally, I always start with the lightest colour I want on my image and then add darker and darker where I need shadow or to add form. I also use opposite colours - if I'm using reds I add a green too as it gives more intensity. And you know, black is never black - always a mix of primary and secondary colours! Think of kids and paint - by the time they have finished, all the paint is a muddy blackish colour! That way your black looks real black and not flat black.

Anyway! For my card here, I've used a sheet of acetate and papers from Funky Daze from Funky Hand plus some mint green organza ribbon that I seem to have a never ending roll of!

I've used my Nesties to cut the shape and then stamped the sentiment directly onto it. The image has been added after I've coloured it with Promarkers with foam pads so it gives more depth. Both the sentiment and gift are from the Our Betty acrylic stamp range from Funky Hand.

The Promarker colours that I have used are:
Apple
Meadow Green
Pear Green
Pastel Blue
Powder Blue
Royal Blue

I use what I like and how I like it - everyone is different but its about finding your own style and developing that! I'd love to be able to colour hair with the fab highlights, but it's just not me yet, so I'll carry on doing my own thing.

  • All papers: Funky Daze from Funky Hand
  • Image and Sentiment: Our Betty acrylic stamps from Funky Hand
  • Colours: Promarkers
  • Everything else: My stash

Wednesday 23 February 2011

And More Decorations!

At risk of saying that I've made another Christmas card with more Christmas tree decoration, well, I have and here it is! Over on Jingle Belles Rock this week, the challenge is a double one as it uses the sketch from Sketchy Thursday, so one card equals two challenges!


And Sketchy Thursday is one challenge I'd not come across before.... Fatal as you know I'll be back as I do like sketches! Anyway, I've used some very lovely felt off white card as my card base, added a 4.5x6.5 sheet of sparkly card (Dovecraft Noel cardstock) - another of the bargains I bought in the January sales! The tree decoration is from Tesco's (on the 3 for 2 offer so I bought 3 different packs - seemed rude not to!) and the organza burgundy ribbon is from my stash. I've added a few gems to the top of the card. For closure. Cos it needed it.

So there you have it. I need to get out more and stop using Christmas tree decorations on my cards. Is it just me who gets excited when in a shop and realising that the decorations are flat and light enough to be added to cards? Ah, it is just me. Ah well!

  • Backing paper: Dovecraft 4.5x6.5 Noel pack
  • Embellishment: Tesco's Christmas tree decoration
  • Everything else: My stash

Hoppy Birthday!

A quick little card that I have made for the Pattie's Creations Challenge which this week is

Pets

And I'd say the frog qualifies for it, although I've never had one as a pet, I'm sure there are plenty who do!

I've used Promarkers to colour it and the main backing paper is from Tinker and Co with the greens from Funky Hand (probably Funky Daze!)

I've used Nesties for the shapes and layered it all with foam pads to give a bit of depth. I've handwritten the sentiment as I found the die cut tag from a previous creation that I'd not used, and the ribbon is from my stash.

I've got achy arms and wrists today - spent most of yesterday cleaning, and I mean cleaning!! Jacob was a big help and tried on most of the clothes in his wardrobe so we can pass on the ones that are too small. I used to get quite good wear from Samuel's clothes as they were then passed to Jacob, however Jacob is a big lad (he's above the 98th centile for height and weight - in proportion though!) and is almost the same size as his older brother so things don't last that long these days!

  • Image: Patties Creations, coloured with Promarkers
  • Papers: Tinker and Co and Funky Hand
  • Dies: Spellbinder Nestabilities and Sizzix tags
  • Everything else: My stash

Dude Time Doodles - March New Release & Blog Hop!

It's the fourth Wednesday of the month (where has February gone?!) so its time for the unveiling of the new release digital stamps at Dude Time Doodles. And when it is new release day, its also the BLOG HOP!!

I've used Ollie Octupus and coloured him with Promarkers and yes, you've guessed it - glossy accents! In fact it looks pretty much like he's just jumped out of the sea and onto my wobble card! If you like the look of Ollie and any of the other digi stamps you see on your travels, simply pop over to the shop and purchase!!

The sentiment has been cut using my Baby Face alphabet set from Cuttlebug and the number 8 is Sizzix Round-a-Bout alphabet dies and they have been coated with glossy accents too!

Ollie has been layered onto a plain blue background and then onto the spotty green background - both are papers from Craft The Year Away from Funky Hand. A bit of doodling around the edge and its complete!

Oh, and Ollie wobbles too! I felt quite indulgent the other day (well, just bought some right bargains in the craft section - some paper packs reduced to 99p!) when I was in The Range so the pack of Papermania card springs fell into my basket!

Right, onto the blog hop! If you've arrived at me from Cleota then you are doing just fine! But you can start anywhere and as long as you go full circle and leave comments at each stop, then you could be a lucky winner! One of the Design Team will be the mystery hostess - if my name is picked then you could be picked as the winner from all my comments on this post! So after me, you need to hop to Hetty.

As this post goes live at 2am all the links in the hop may not yet be fully linked as we do like to make it easy for you and link directly to each post so you don't have to scroll through millions of posts. So once I'm up and suitably awake, I'll link Cleota and Hetty with their direct blog hop post. If you click and the links are fine - just ignore me!

  • Image: Ollie Octopus from Dude Time Doodles
  • Papers: Craft The Year Away from Funky Hand
  • Dies: Cuttlebug Baby Face alphabet, Sizzix Round-a-Bout alphabet
  • Spring thing: Papermania
  • Everything else: My stash

Tuesday 22 February 2011

Craft Juice Tuesday - Week 53

Welcome to another Craft Juice Tuesday! For more information about each item featured, please click on the photo!

I just love this little Oink ceramic brooch from Dottery Pottery

This looks too good to wear! Buy from Deelights


And this just makes me smile!! Buy from Tammoony Kids


See you next Tuesday for more Craft Juice Tuesday!

Monday 21 February 2011

Say It With Flowers

I had a sort through all my stamped images a few weeks ago to see what I had and probably what I could do with. Most of the images are from stamp swops, RAK's or ones that I've had for ages. Not sure where this image came from but decided that it fitted the Penny Black at Allsorts challenge this is:

Say It With Flowers

I've coloured it with Aquamarkers as I like the richness they give and I find they are a lot quicker to use than Promarkers! The sky wash has been done with watercolours. I've rounded the corners, added some tiny half pearls and used some of the never ending Tempting Turquoise Stampin' Up ribbon and a hat pin that I made myself.

The papers are a freebie pack I got a while ago from a craft magazine - My Minds Eye, Pretty Please Spring Papers 6x6 stack.

  • Image: Penny Black, coloured with Aquamarkers
  • Papers: My Minds Eye - Pretty Please Spring Papers 6x6
  • Ribbon: Tempting Turquoise - Stampin' Up
  • Everything else: My stash

Sunday 20 February 2011

Robot Doorhanger

I have a pile of digital images that I've already printed out, usually because I'm after one or two specific images and don't like to waste the rest of the sheet, so I fill it up with other images which them wait for me to colour and use! This lovely little robot image from Tiddly Inks is just one, and when I saw their current challenge:

Monochromatic

I decided that he could be coloured and used! I've gone for a grey, silver and black theme and made this cute little doorhanger by layering black card and cutting out the shape. I've doodled a line around the edges with a white gel pen and then added a silver embossed panel (Cuttlebug folder) to the centre and then the image.


I've used Promarkers - all Cool Grey shades - to colour plus a little glossy accents (see how much I like this product - its on everything I make now!) on his eyes and digital chest display. Although the photo does not show it too well, I've added a jet black gem to the handle plus two clear ones and tied some thin ribbon too.

I think Jacob has his eye on this doorhanger and he's also keen for me to use glossy accents as he is fascinated with the finish when its dry!

  • Image: Tiddly Inks, coloured with Promarkers and a bit of glossy accents
  • Dies: Cuttlebug embossing folder
  • Everything else: My stash

Saturday 19 February 2011

Wobbly 18

I'm on a bit of a mission at the moment as I have quite a few cards to make in a fairly short space of time! Always the case eh?! This one fits the Pollycraft challenge which is:

Special Birthday's

All the papers are from the new Funky Hand cd - Craft the Year Away and I've used wordart to make the numbers. To make the wordbook a little different I've cut the spine a little differently and then doodled a fine black line around the edge.

The ribbon is a perfect colour match and is Tempting Turquoise from Stampin' Up. The numbers have got little die cut letters on them (Cuttlebug Baby Face alphabet set) and I've added glossy accents over the top so they stand out more. The large numbers I've attached with some funky springs and then added some Birthday buttons that Enfys sent me.

So there you go! I'm also in danger of using my new purchase of glossy accents (why didn't I have these before?!) on virtually everything - so be warned!!
  • All papers: Craft The Year Away by Funky Hand
  • Ribbon: Tempting Turquoise from Stampin Up
  • Wobblers: Papermania
  • Dies: Cuttlebug Baby Face alphabet set

Friday 18 February 2011

Polkadoodle Challenge 7 - Chocolate!

It's Friday so that means it is time for another Polkadoodle challenge! Our own little Belgian chocolate girl (Saskia) has set the challenge this week and she wants to see:

Chocolate!

So either use the colours for inspiration, or make it look like chocolate or even use real chocolate!

I've used the decoupage template from Candy Doodles cd and its one that I return to time and time again as it is so easy to make but looks great!

I've layered up all the elements with foam pads, added glossy accents to the chocolate topping and glitter glue on the ribbon bow and that is it! Really easy and quick to make!

Good luck with the challenge - closing date is Sunday 27 February at 12noon GMT.

  • Cupcake: Candy Doodles cd

Thursday 17 February 2011

Pretty In Pink

The Penny Black challenge this week is a lovely one! It is:

Pretty In Pink

I've used a cute hedgehog and daisy image which I've coloured mainly with Aquamarkers - the sky is coloured with watercolours and the deck chair Promarkers. The daisy was supposed to be more of a delicate pink however I think my Aquamarker collection needs expanding a little!

The paper is Basic Grey Sultry 6x6 and I've simply added a rather large and extravagant hot pink satin ribbon and bow! Also four little half pearls to the top right of the card. The image has been layered onto some pink card from my stash which I've rounded the edges, inked and then dotted a fine line around the edge of the actual image to keep it from 'falling out' so to speak!

  • Image: Penny Black, coloured with Aquamarkers, Promarkers and watercolours
  • Paper: Basic Gray Sultry 6x6
  • Everything else: My stash

Wednesday 16 February 2011

Dude Time Doodles Challenge 8 - Photo Inspiration

Welcome to another Dude Time Doodles challenge! This week it is an inspiration challenge from the photo below. Our rules are really simple - make your project for a bloke - funny, sarcastic or witty just as long as it is publishable! And link up through the Dude Time Doodles Challenge blog!

I've used Cowpoke Cal along with a sentiment and he's been coloured with Promarkers. I've used a kraft card blank as it was perfect for the cowboyish colours along with DCWV Retro Stack 6x6 papers.


For all the shapes I've used my nesties and then inked the edges and doodled a fine line to finish.
Plus a bit of obligatory rootin' tootin' string! Good luck with the challenge and I hope you can join us! You don't need to use a Dude Time Doodles image, but if you do it will really make us smile! The challenge is open until Tuesday 22 February evening - US time.

  • Image: Cowpoke Cal and sentiment from the same set, coloured with Promarkers
  • Papers: DCWV Retro Stack 6x6
  • Dies: Nestabilities
  • Everything else: My stash

Tuesday 15 February 2011

More Decorations

At risk of seeming like I only use Christmas decorations as card embellishments, here is another card made with yes more Christmas tree decorations! This very glittery snowflake was bought from Tescos when the decorations were on a 3 for 2 offer! I've snipped off the prong (do snowflakes have these?!) which had the loop attached and then simply glued it to the backing papers.


The papers are from Mad About Cards and are part of a traditional Christmas download. I've inked the edges and layered the word panel onto some gold card. The ribbon is from the Scrap Store that I found in my stash. The layout follows the sketch from the ABC Christmas challenge and the theme is Clean and Simple.
  • Backing papers: Mad About Cards download, traditional collection
  • Embellishment: Christmas tree decoration from Tesco
  • Ribbon: Scrap Store

Craft Juice Tuesday - Week 52

Welcome to another Craft Juice Tuesday! For more information about each item I've featured, please click on the picture and you will be taken to the relevant Craft Juice listing.

This week its because these items caught my eye!

Cookie replica steel plugs from Glamasaurus


A wonderful steampunk heart ring from CandyPunxxx

A wonderful and vibrant mixed media artwork from Crafty Pagan

See you again next Tuesday for more Craft Juice Tuesday!

Monday 14 February 2011

No Red She Said!

Sometimes there are challenges that I really like. Really really like as I know EXACTLY what I'm going to make and I feel so satisfied when it turns out just how I imagined! Well, this one is a bit of a re-run from a few weeks ago - see here - but the opportunity was too good to miss!

It's for the Jingle Belles Rock challenge which is:

No Red She Said!

So, after lovin' the sketch from a few weeks ago (and the fact I got an honourable mention for it on the blog!) I went with the theme again. This time I've used one of the shocking purple tree ornaments (Sainsbury's) from the same pack and layered it with another of the heavily glittered silver ornaments (Matalan). And of course, both packs were in the January sales!

The left over gem from the reverse of the silver snowflake has been added to the top left of the card along with a few other gems from my stash.

The backing paper is Bazzil swiss dots coloured stuff that I bought almost 2 years ago (shocking I know!) Bit of corner rounding, inking and that is it! Someone somewhere will want a purple Christmas card I hope!

  • Embellishments: Christmas tree ornaments
  • Backing paper: Bazzil swiss dots

Sunday 13 February 2011

Last Year's Earrings

I found a brand new challenge site with its very first challenge! Actually I found it whilst having a nosey on Colettes blog, liked the look of the challenge, and well, here I am!

The challenge blog is The Clipart Fairy Challenge and the theme is a sketch but a semi circle has to be used along with a heart. And to use The Clipart Fairy elements / papers too.


The papers I downloaded are freebies from the blog and I decided to go with a Christmas theme (well it's chucking it down and it certainly doesn't feel like spring yet!) I've not got a large enough heart to use and as I'd already decided on a snowflake theme, I went with that.

So I've used a glittered wooden snowflake which probably, knowing what I buy, is intended as a Christmas tree decoration, but for 4 of this size and one twice the size for a £1 in the Poundshop in Blackburn, how could I resit (I bought two packs!) And then added red gems on the ends of the flake.

The large blingy heart is actually part of a set of earrings I bought after last Valentines Day in Asda. There were two reds and two clear earrings in the set reduced to 50p. Bargain! The stud part behind actually folds down quite well and with a bit of double sided foam under it, it all glues quite well!

So not sure if it actually fits the challenge theme, but I have used a heart!!

  • All papers: The Clipart Fairy, freebies
  • Snowflake: Poundshop
  • Heart: Earring from Asda
  • Everything else: My stash

Computer Games

You'll be forgiven if you think you've seen this paper very recently!! It's a freebie download from Bearly Mine and I've only trimmed it slightly so it fitted the card blank. It's also for their current challenge which is:

For Boys / Men

I've used a pre-printed die cut image from Lili Of The Valley which has been framed by the aperture from a Nesties die cut that I'd kept from a previous project.

The dark blue card and corrugated card are both from my stash along with the string. Quite a cute image, don't you think!!

  • Backing papers: Bearly Mine
  • Image: Lili of the Valley
  • Dies: Nestablities
  • Everything else: My stash

Saturday 12 February 2011

Wooden Love

I found a new challenge site to me the other day whilst blog hopping! And as I've got the new Funky Hand download Love Love Love to play with, I thought I would indulge myself! The challenge site is Card Makin' Mamas and the current challenge is:

Valentine

So here is mine! The wooden heart with cupid in the centre is actually a Christmas decoration which I bought in the sale (along with 11 other in the pack) from Matalan. I'm not really seeing the Christmas link, but a bargain is a bargain to me! I've tied a length of embroidery thread round the loop at the top and layered it onto one of the sheets from the download printed at A5 size.
The ruffle at the bottom is simply a strip of printed paper that has been randomly folded and then glued down and I've added my last bit of thin red ribbon to it too!

  • All papers: Love Love Love download from Funky Hand
  • Embellishment: Matalan
  • Everything else: My stash

Stars

A card made in double quick time, which makes a change really as recently its been taking me ages! Fortunately, I'd already layered up the die cut decoupage Forever Friends bear so it was simply a case of finding some papers to fit the current Forever Friends challenge which is:

Stars

The papers are from a freebie download from Bearly Mine and I was using them for their challenge too (it will be blogged tomorrow!) and realised that they fitted perfectly!

I've simply printed the paper off to fit the card blank so all the distressing is the actual printed paper.

The sentiment is from an Elements pack which was left over from a previous project and the stars are actually Christmas gift tags - the points with holes are under the bear! And I've added tiny blue half pearls to the points.

  • Image: Forever Friends die cut decoupage
  • Sentiment: Forever Friends Elements
  • Backing paper: Bearly Mine freebie
  • Stars: From my stash

Simply Create Challenge 37 - Bright and Bold

It's time for another Simply Create challenge! We had an overwhelming response to the last challenge so please bear with us whilst we go through the entries!

This fortnight we are sponsored by Robyns Fetish and the design team have been sent some images to play with! The theme is:

Bold and Bright

I've used this cute image, coloured her with Promarkers and added some glitter glue and made her into a shaped bookmark!

The bright pink backing card is from my stash along with the ribbon (which is actually a perfect match although the photo does not show it) and the flower pewter brad. Good luck with the challenge - for more details on how to enter please see the challenge blog!

  • Image: Robyns Fetish, coloured with Promarkers and glitter glue
  • Everything else: My stash

Friday 11 February 2011

Lots of Hearts

I'm now feeling a lot better, still not quite right but feeling more me! Funky Hand has released a brand new download called Love Love Love and I've had a little play with it! It's full of papers for any occasion really but there are some particularly love themed ones too!

I've made this using some of the red papers printed at A5 size for a smaller print and punched out lots of hearts. I then curled the edges before gluing to a heart shaped template on my card base. I've added a few half pearls here are and there and punched a smaller heart from the bottom corner. There actually is a larger heart underneath but the angle of the card does not show it too well.

The card fits the Die Cut Dreams challenge which is:

Lots of Hearts but no sentiment


  • All papers: Love Love Love download from Funky Hand
  • Everything else: My stash

Polkadoodle Challenge 6 - That's Amore!

It's Friday so time for another Polkadoodle challenge! This week the theme has been set by Miria and it is:

That's Amore!

So use love songs or films to inspire you this week!

I've used the Recipe for a Great Day template from Paper Boutique Vol 3 and all I've added is a bit of glitter glue, two sparkly brads and some ribbon!

Really easy and simple! And my song? Breakfast at Tiffany's by Deep Blue Something as I thought it looked like the start of a breakfast!

Good luck in entering the challenge and please remember our rules especially the 10 challenge limit as we do seem to have a lot of entries that flout this rule! The deadline is Sunday 20 February at 12noon GMT.

  • All paperbased elements: Paper Boutique Vol 3
  • Everything else: My stash

Tuesday 8 February 2011

Two for One

Apologies for being missing in action recently - still been quite poorly and have been rather sick and ill. Bit like having a really massive hangover but without the alcohol and a bad cold on top of it. Nice.

Anyway, I'd started the last Sarah Hurley challenge which was a sketch and didn't manage to finish it in time. So I was pretty pleased when I saw that the current one was

To Use Die Cuts

Perfect! So I combined last weeks sketch (sort of) and this week's die cuts! And managed to make two cards with it as well! All the papers are from Dreams Come True from Funky Hand. I've used images from Soft Pencil and coloured with Promarkers.


The die cuts are Cuttlebug train set and I think Sizzix train track (bought the train track die cuts from ebay a long time ago!) The buttons and string are from my stash.

Apologies for the slightly blurry second picture - combination of yuckiness and having to kneel on a hard kitchen floor to take the picture!

With a bit of luck I'll be feeling better soon and back to normal!

  • All papers: Dreams Come True from Funky Hand
  • Images: Soft Pencil, coloured with Promarkers
  • Die Cuts: Train - Cuttlebug, Track - Sizzix
  • Everything else: My stash

Craft Juice Tuesday - Week 51

Welcome to another Craft Juice Tuesday week! As it is fast approaching Valentine's Day, I thought I'd share some lovely (geddit?!) themed items. If you want to know more about each item, just click on the photo and you will be taken directly to Craft Juice and from there you can click and go to the sellers marketplace.

I do have a thing for glass and this is no exception! Buy from Kokokelii
Or what about a wooden shabby chic heart? Buy from Gillian


Ah, Marilyn Monroe - captured by the very talented Clare from SilentTheatre


See you next Tuesday for more Craft Juice Tuesday!

Saturday 5 February 2011

Get Funky Challenge - Going Round In Circles

It's my turn to show the sample I've made for this months Get Funky! Challenge which is:

Going Round In Circles

Every three days one of the Funky Hand Design Team will show their sample - the challenges start on the Funky Fifteenth of the month and run until the 14th of the following month at 7pm so you get plenty of time to create and enter!

A winner will be picked each month who will receive a £20 voucher to spend at Funky Hand and runners up will receive blinkies! All you need to do is follow the theme - and Anice will have designed a freebie in keeping with the theme for you to use each time - and to use a Funky Hand product. This month the freebie is here!

I've made this handbag card and used the funky freebie for the ruffled flowers. The other papers are taken from Colour Me Happy and are a perfect match!


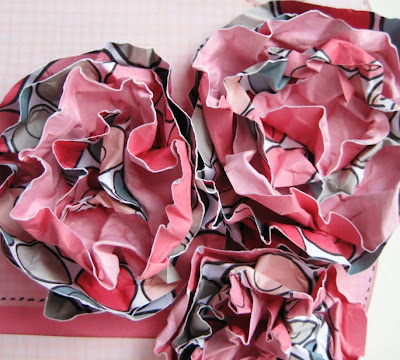
The sentiment topper is from Now That's Funky. The flowers have been made by cutting out different sized circles from double sided paper, scrunching them up and then adding a brad through the centre. Really easy and quick to do!

A little bit of faux stitching around the edge and my card is complete! Good luck in entering the challenge!

  • Flowers: Funky Freebie
  • Papers: Colour Me Happy
  • Sentiment: Now That's Funky

Friday 4 February 2011

Slightly Sozzled Santa

I suppose I am a bit of an impulse buyer, especially when something is a bargain as I know I will use it at some point, one day! And the Santa on this card is just this! It's a die-cut decoupage image that I bought from my local craft shop a while ago for a bargain. The bits were easy to pop out and I've layered it with foam pads.

So, as I'd actually made the image and it was simply hanging around, it needed to be used. So when I saw the Crafty Hazelnut Christmas challenge for this week - its a perfect fit! The theme is

Santa

And I've used the very lovely Jingle Belles sketch from their last challenge (I got an honourable mention - who-hoooo!) I couldn't lay my hands on any suitable backing paper so decided to weave some embossed (snowflakes and swiss dots) strips of off-cut white card as the background. The tiny fairy lights I've had for donkeys in my stash but never really used them, and I've secured them with a brad and a dab of glue. Santa does look rather sozzled!!

I'm feeling rather rough at the moment - got a cold from hell which I thought was flu on Monday but I'm still moving (just) and I'm not too bad as long as I don't start sneezing or thinking about it. And I look like Rudolf. Great.

  • Image: Die cut decoupage - not got a clue of the maker
  • Embossing: Cuttlebug snowflakes and swiss dot
  • Fairy lights: My stash

Polkadoodle Challenge 5 - Hearts

It's Friday so time for another Polkadoodle challenge! This week I've set the challenge of

Hearts

If you are stuck for inspiration have a look at the Design Team samples. The challenge is open until Sunday 13 February at 12noon and please remember to follow our rules!

I've used the cupcake template from Paper Boutique Vol 3 which I adore! Really lovely to make and it looks great too! I've joined the openings with a strip of chunky ribbon that Jenny sent to me a while ago (thank you!)

I've added punched hearts, coloured them with Promarkers and then added glitter glue over the top. The sentiment on the star has been handwritten.

Hope you can join us this week - good luck!

  • All paperbased items: Paper Boutique Vol 3
  • Ribbon: From Jenny